
How To Make An Outdoor Hanging Wreath With Hobbycraft
So I don't like to speak too soon, but it appears that the warm weather may actually be here to stay for a while. I don't like to jinx it, but it's certainly looking as if it might be consistent (for the next fortnight, anyway) and as a result, I've been dragging every multi tasking furniture item I have into my garden and stockpiling the BBQ coals so that my husband can display his grilling prowess at every opportunity. We always approach the British Summer with an air of apprehension - expect nothing and anything you get is a bonus is a good mantra when describing our weather here in the UK. Anyway, it's certainly been beautiful for the last few weeks. Sunshine has the ability to uplift our mood and you can feel the positivity glowing from the supermarket shoppers when you are joining the queue for your burgers and sausages. Apart from the ones complaining it's too hot, obvs. You can't please everyone.
I'm particularly excited about the warmer months this year as we have finally taken the plunge and had two pergolas built in our garden. We live in Yorkshire overlooking the Wolds (and a major A road but we'll bypass that bit) and our patio is quite exposed to the elements. Prior to these new covered areas, it felt very much like sitting in a windy field. Not only have these two new structures meant that we have a sheltered place in which to sit and eat, but they also have opened up a world of styling opportunities, most notably two rooms worth of overhead beams which are simply crying out for decor.
So when Hobbycraft asked me if I would create a tutorial on how to make a decoration to go over the centre of the table, I jumped at the chance. I've always loved Hobbycraft and it's gained me many parenting brownie points in the past when it comes to craft and school projects. Now, I'm not a particularly creative person when it comes to DIY, it has to be said, but I love a project. Over the years, I've created macrame hangings, stencil art and feather wall art, all of which I've achieved with an average amount of success and, coincidentally, the assistance of Hobbycraft supplies. So I was quietly confident that I would be able to rise to the challenge. Very quietly.
I wanted to keep it fairly neutral to my decor so I decided that I would create a chandelier wreath that was mainly focused on using succulents and greenery. I immediately spotted some glass baubles which, filled with tea lights, would be perfect for hanging from the base and would also provide a soft glow in the evenings whilst we were dining outside in style. I gathered together my supplies and got to work. Here's what I did.
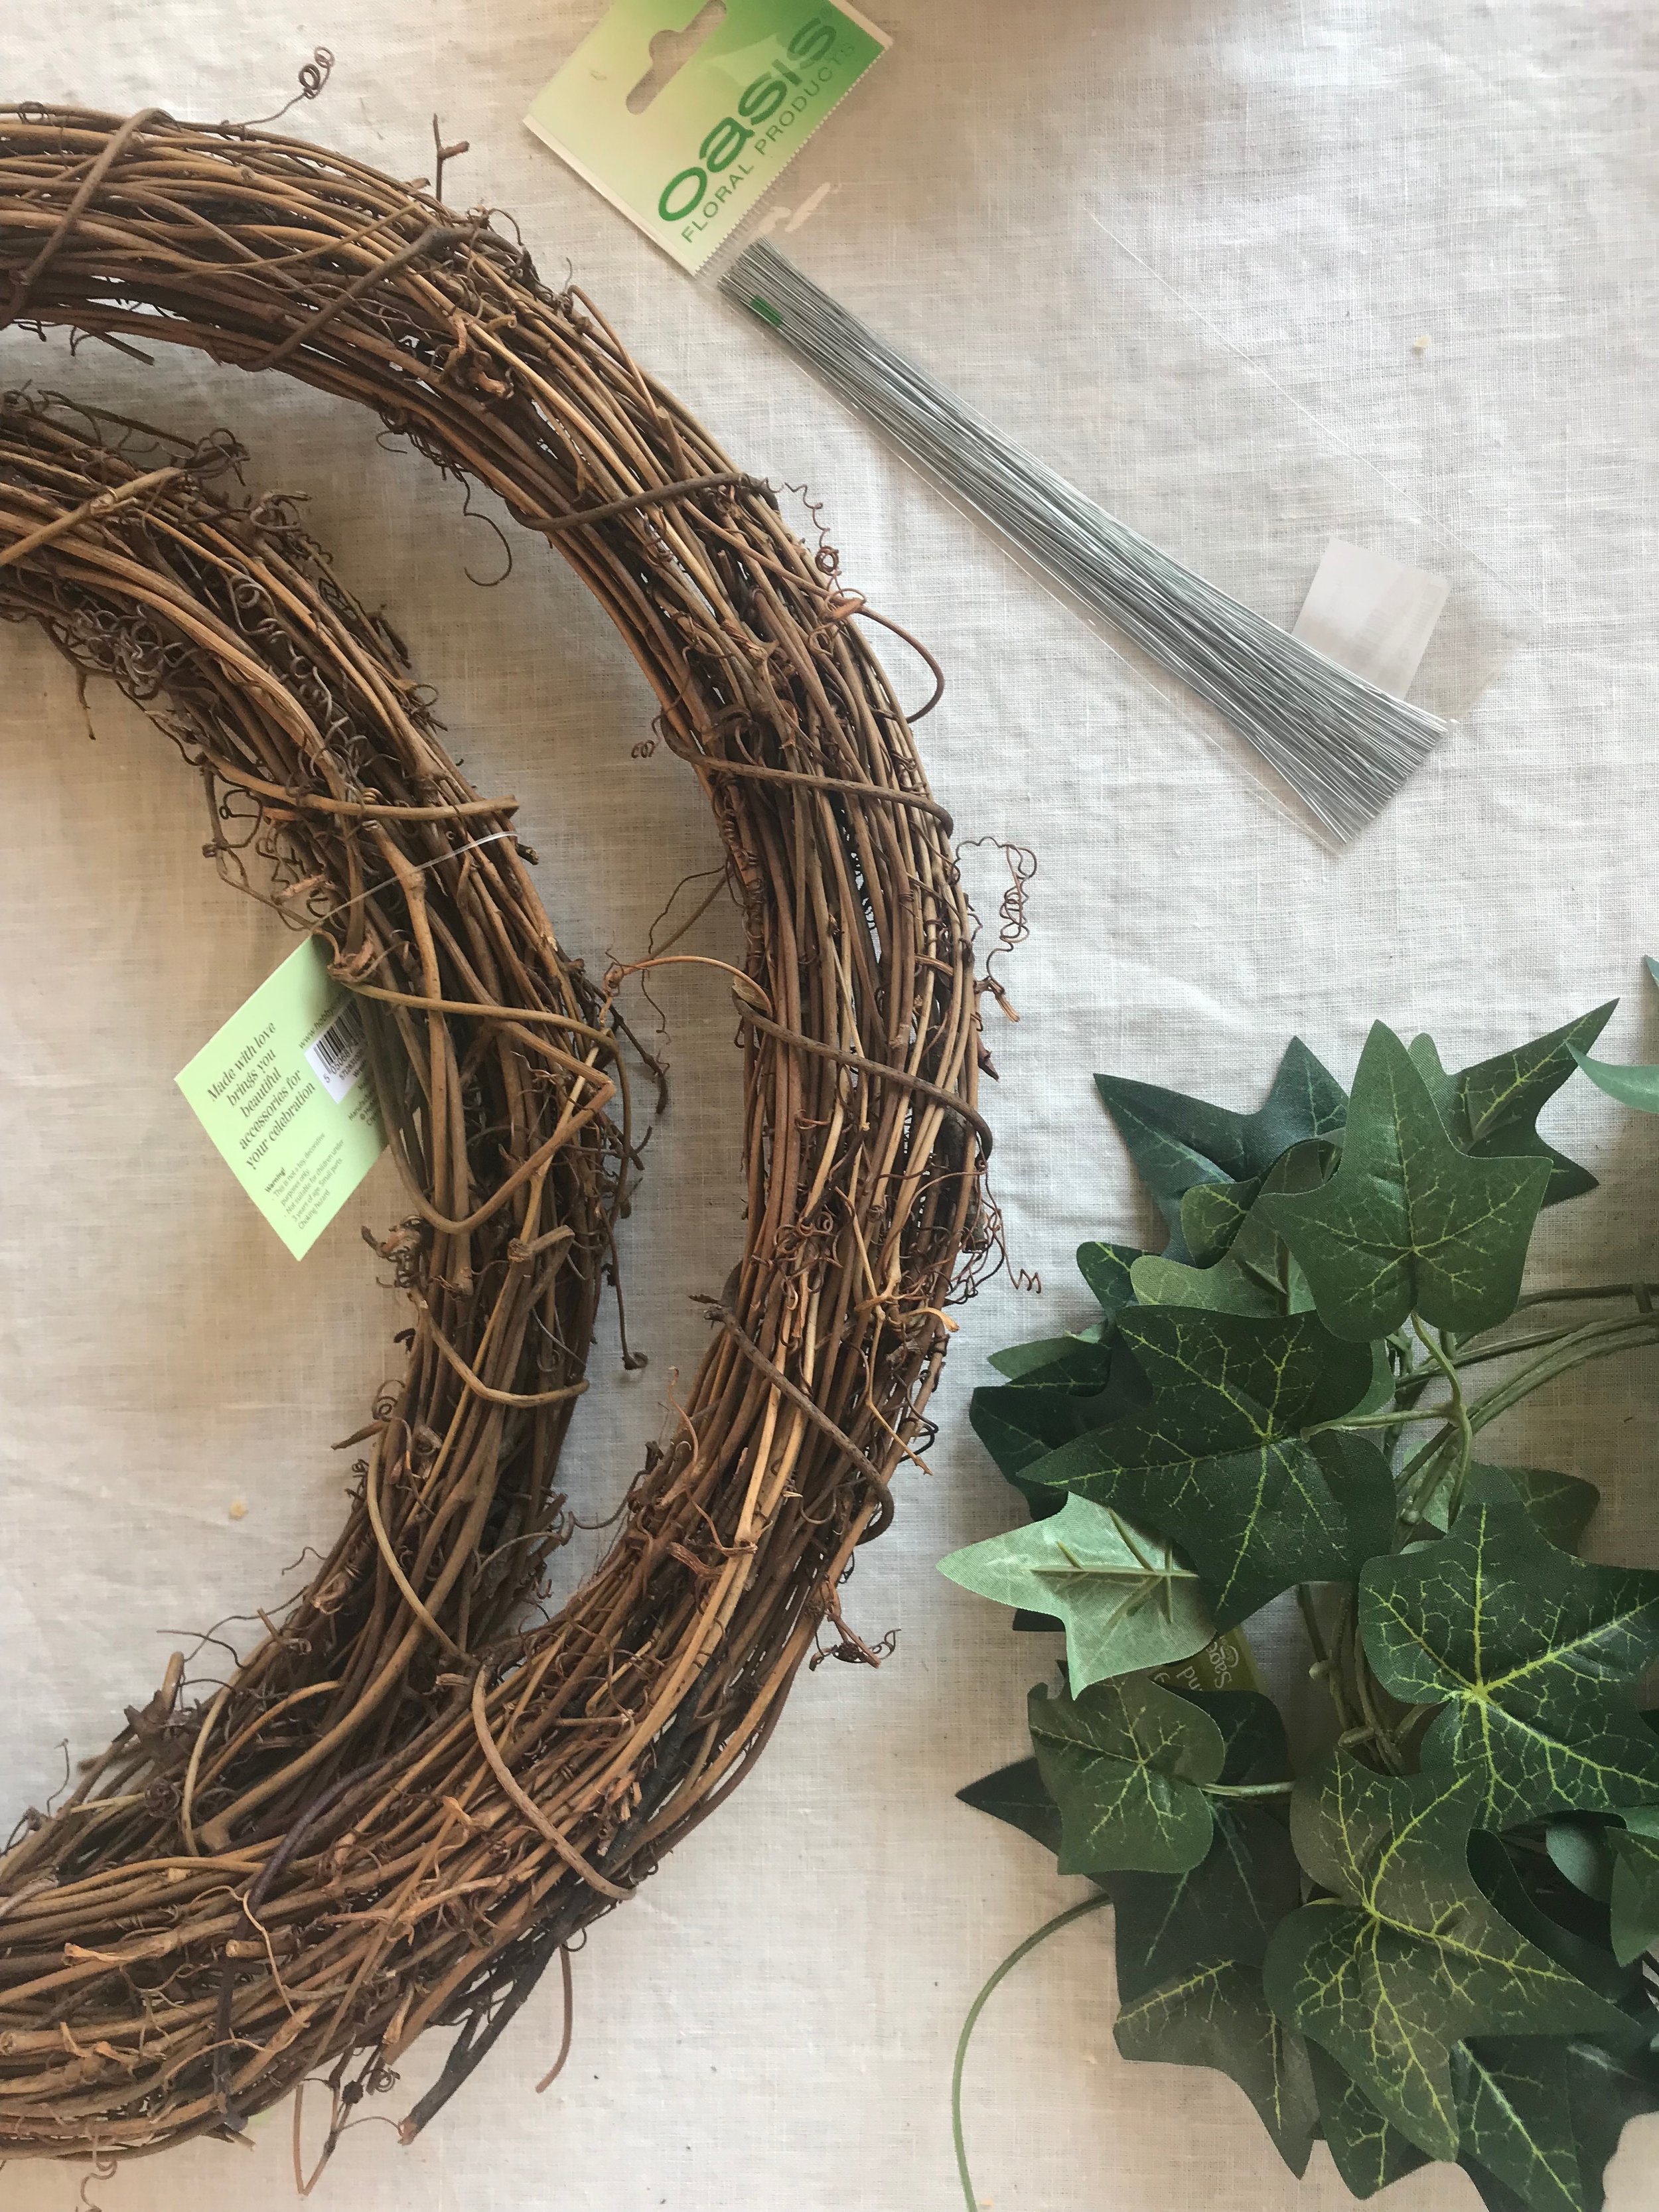
What You Will Need
Ginger Ray foliage string lights
Ginger Ray beautiful botanics vines (for the table)
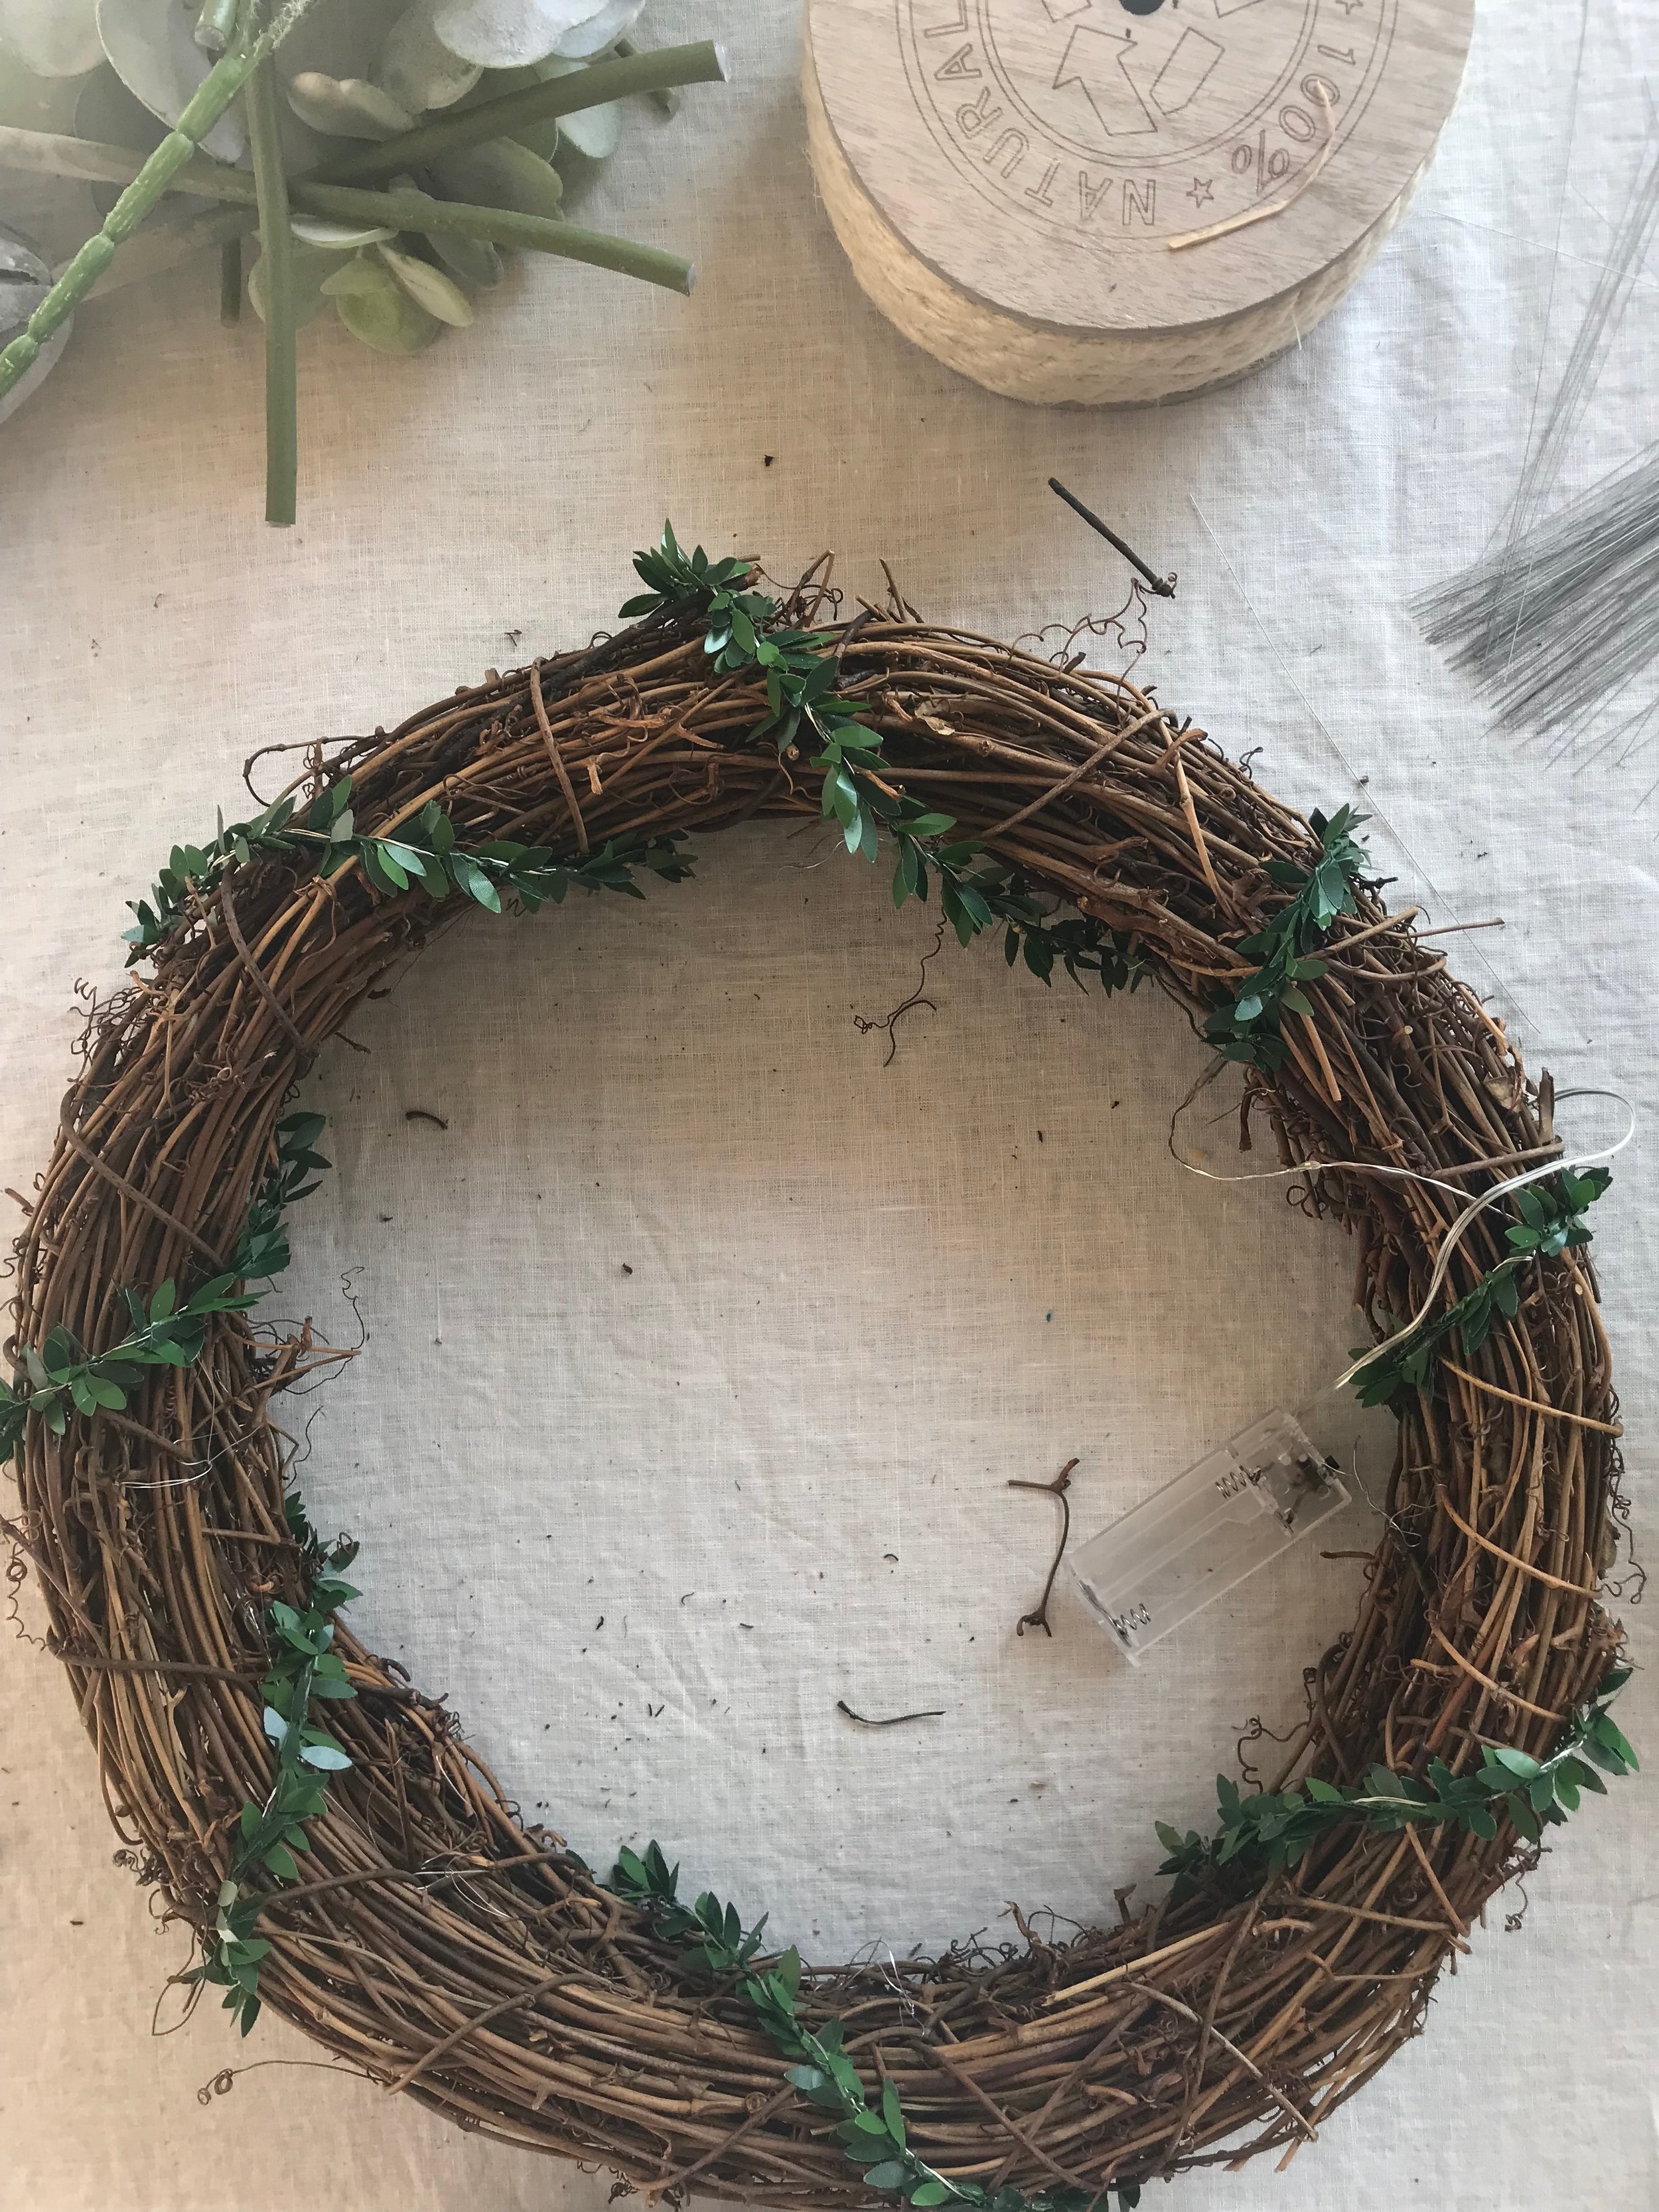
Step 1 - Create The Base
Firstly, I attached the two rattan grapevine wreaths together in four places by using the glue gun. In order to ensure it was secure, I looped hobby wire, again in four places, by pushing it through the wreath branches and binding them together. I used the Ginger Ray foliage string lights to wind around the wreath, making sure the battery pack was inside the circle for later use. The string lights are wire so easy to manoeuvre. This made the base solid.

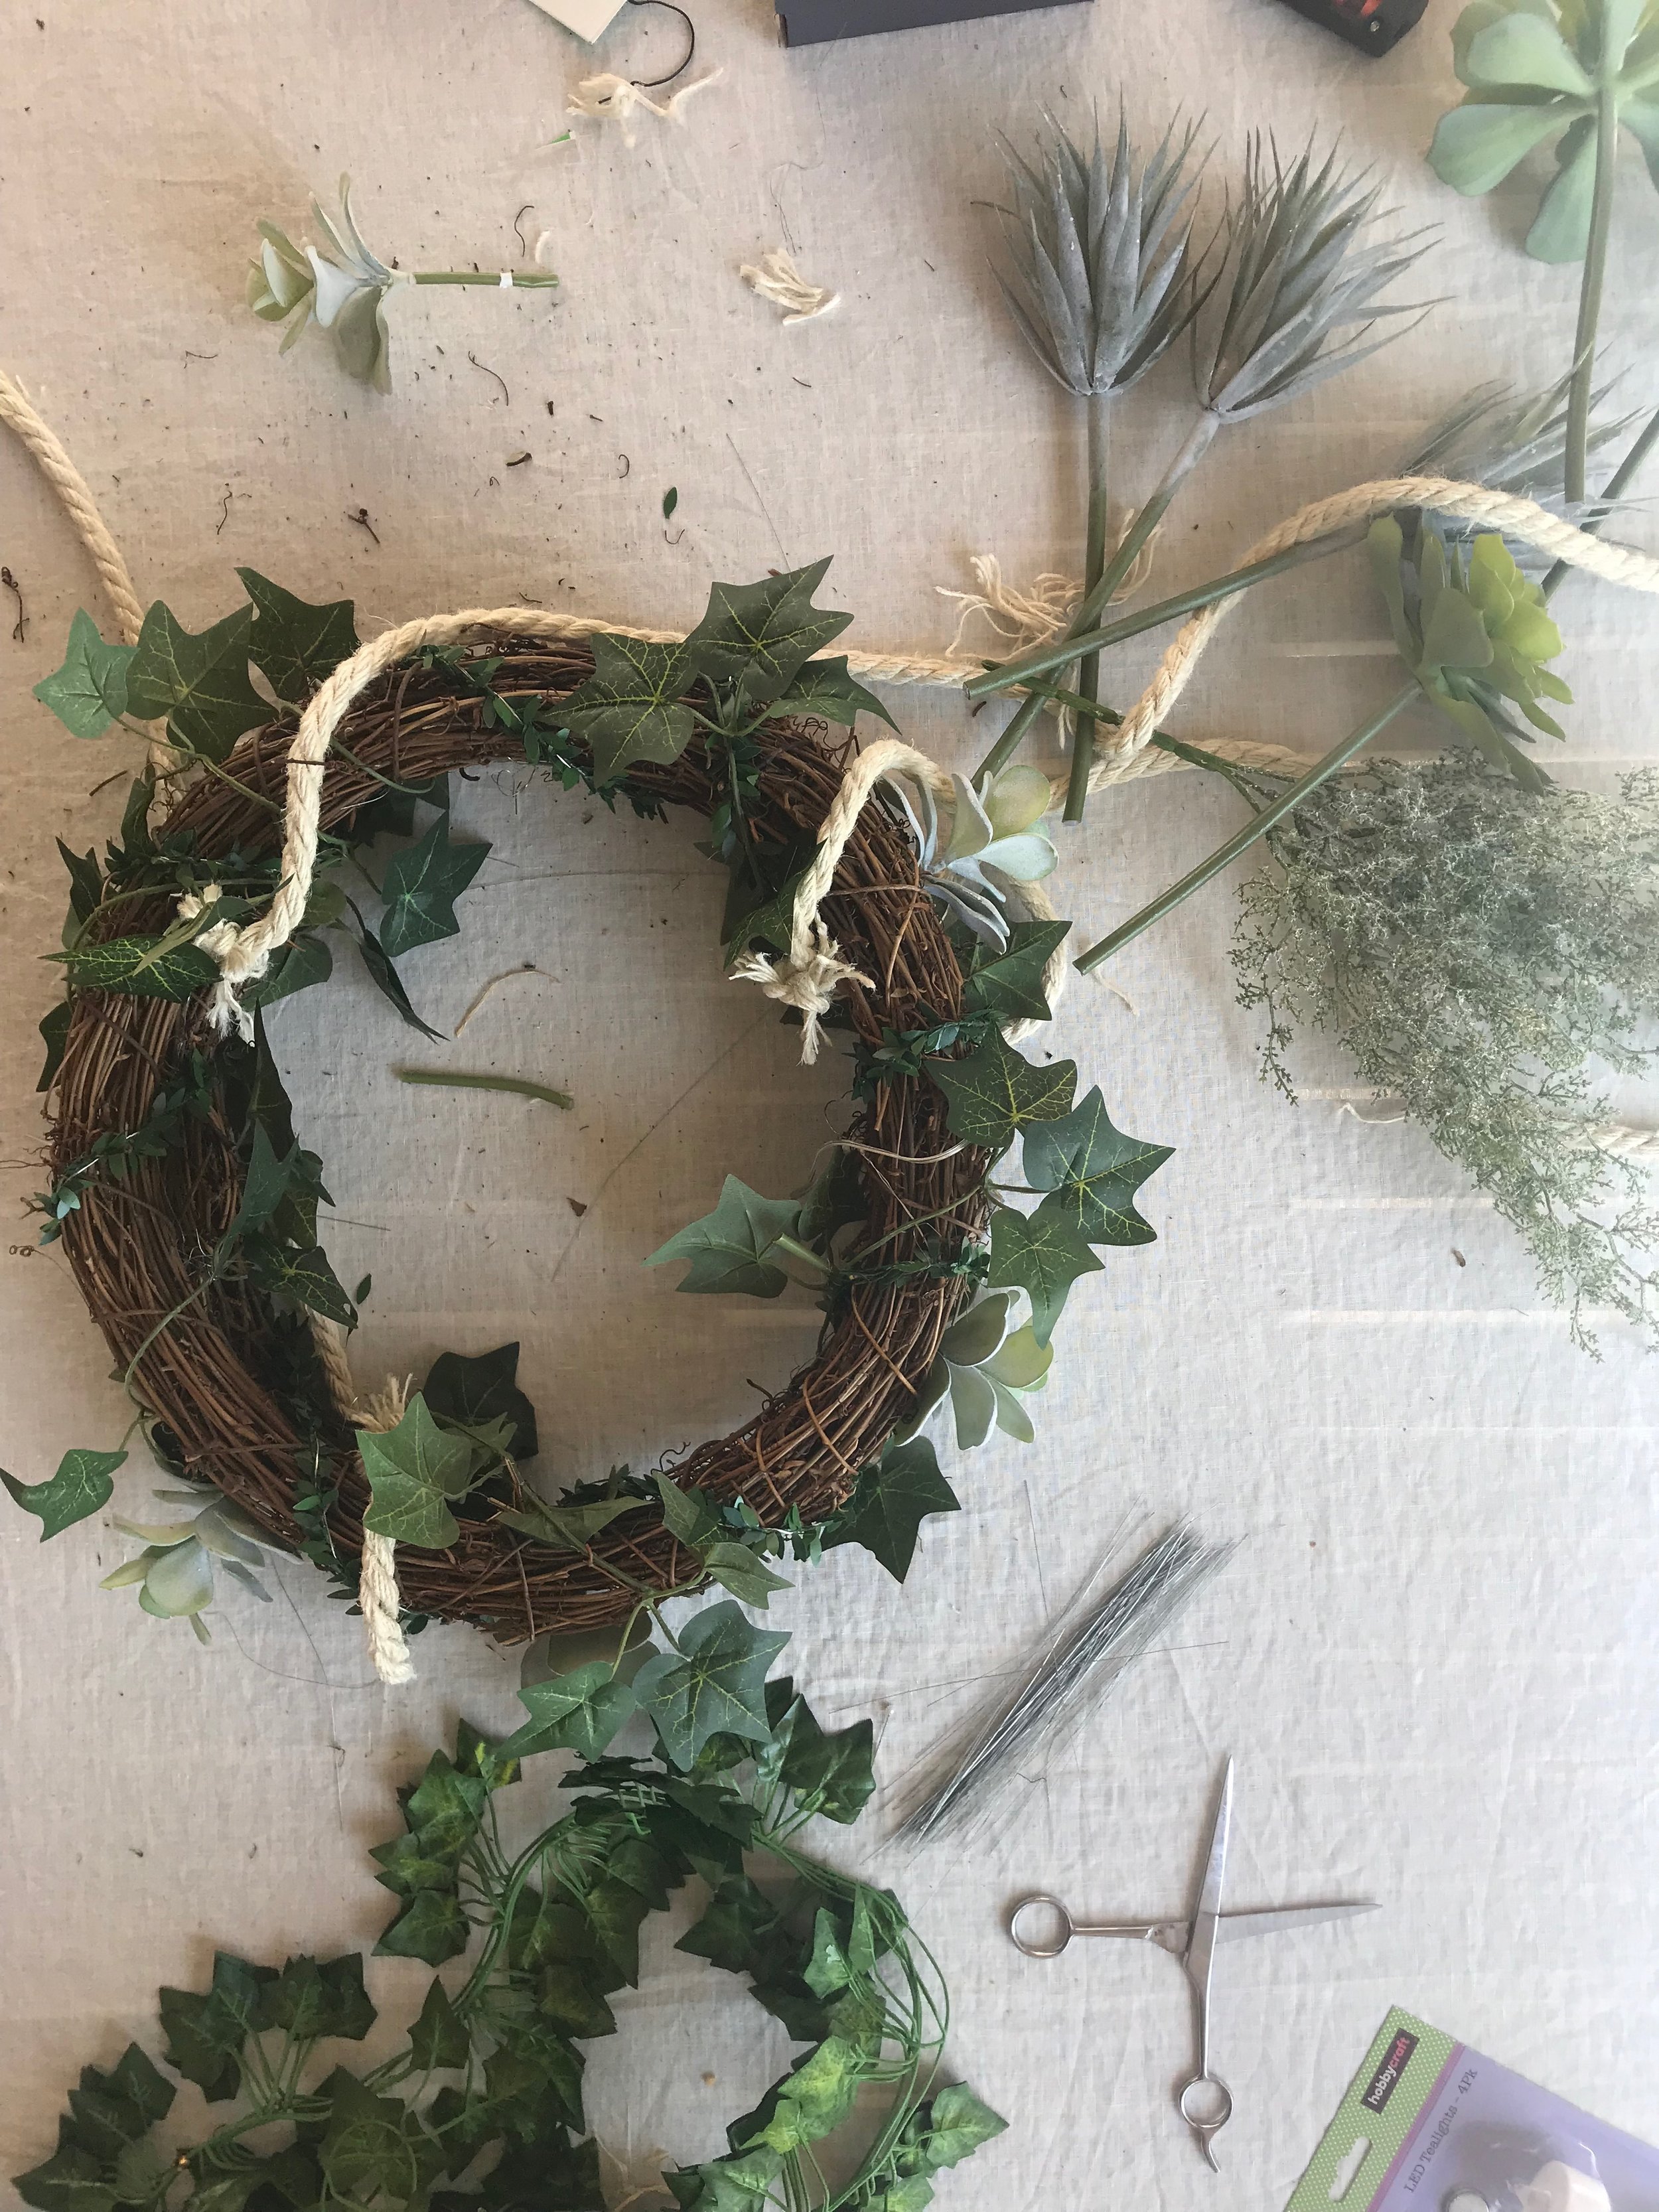
Step 2 - Attach The Rope
The jute rope is very thick and solid so perfect for hanging safely from the roof. I cut three lengths of a metre long each. The rope is wound into three strips - I separated the three strips and then attached to the wreath by threading through the rattan and tying a knot in each. I spaced the three rope lengths equally around the wreath. I added a dab of glue from the glue gun to make sure that the lengths were secure at the base.


Step 3 - Add The Foliage
Firstly, I wound the English Ivy around the wreath, securing it with hobby wire. The rattan weave of the base made it easy to push the succulents through. I placed the smaller succulents first, placing them equally around the wreath and securing them with hobby wire on the inside by attaching it to the rattan. During this whole process, I was careful not to hide the Ginger Ray foliage string lights as they would be the focus of the light later on. The larger succulents I added second, again pushing them in equally around the base on an angle. I secured them with hobby wire. I took the asparagus bush and cut it into three pieces to secure along the base of the wreath.


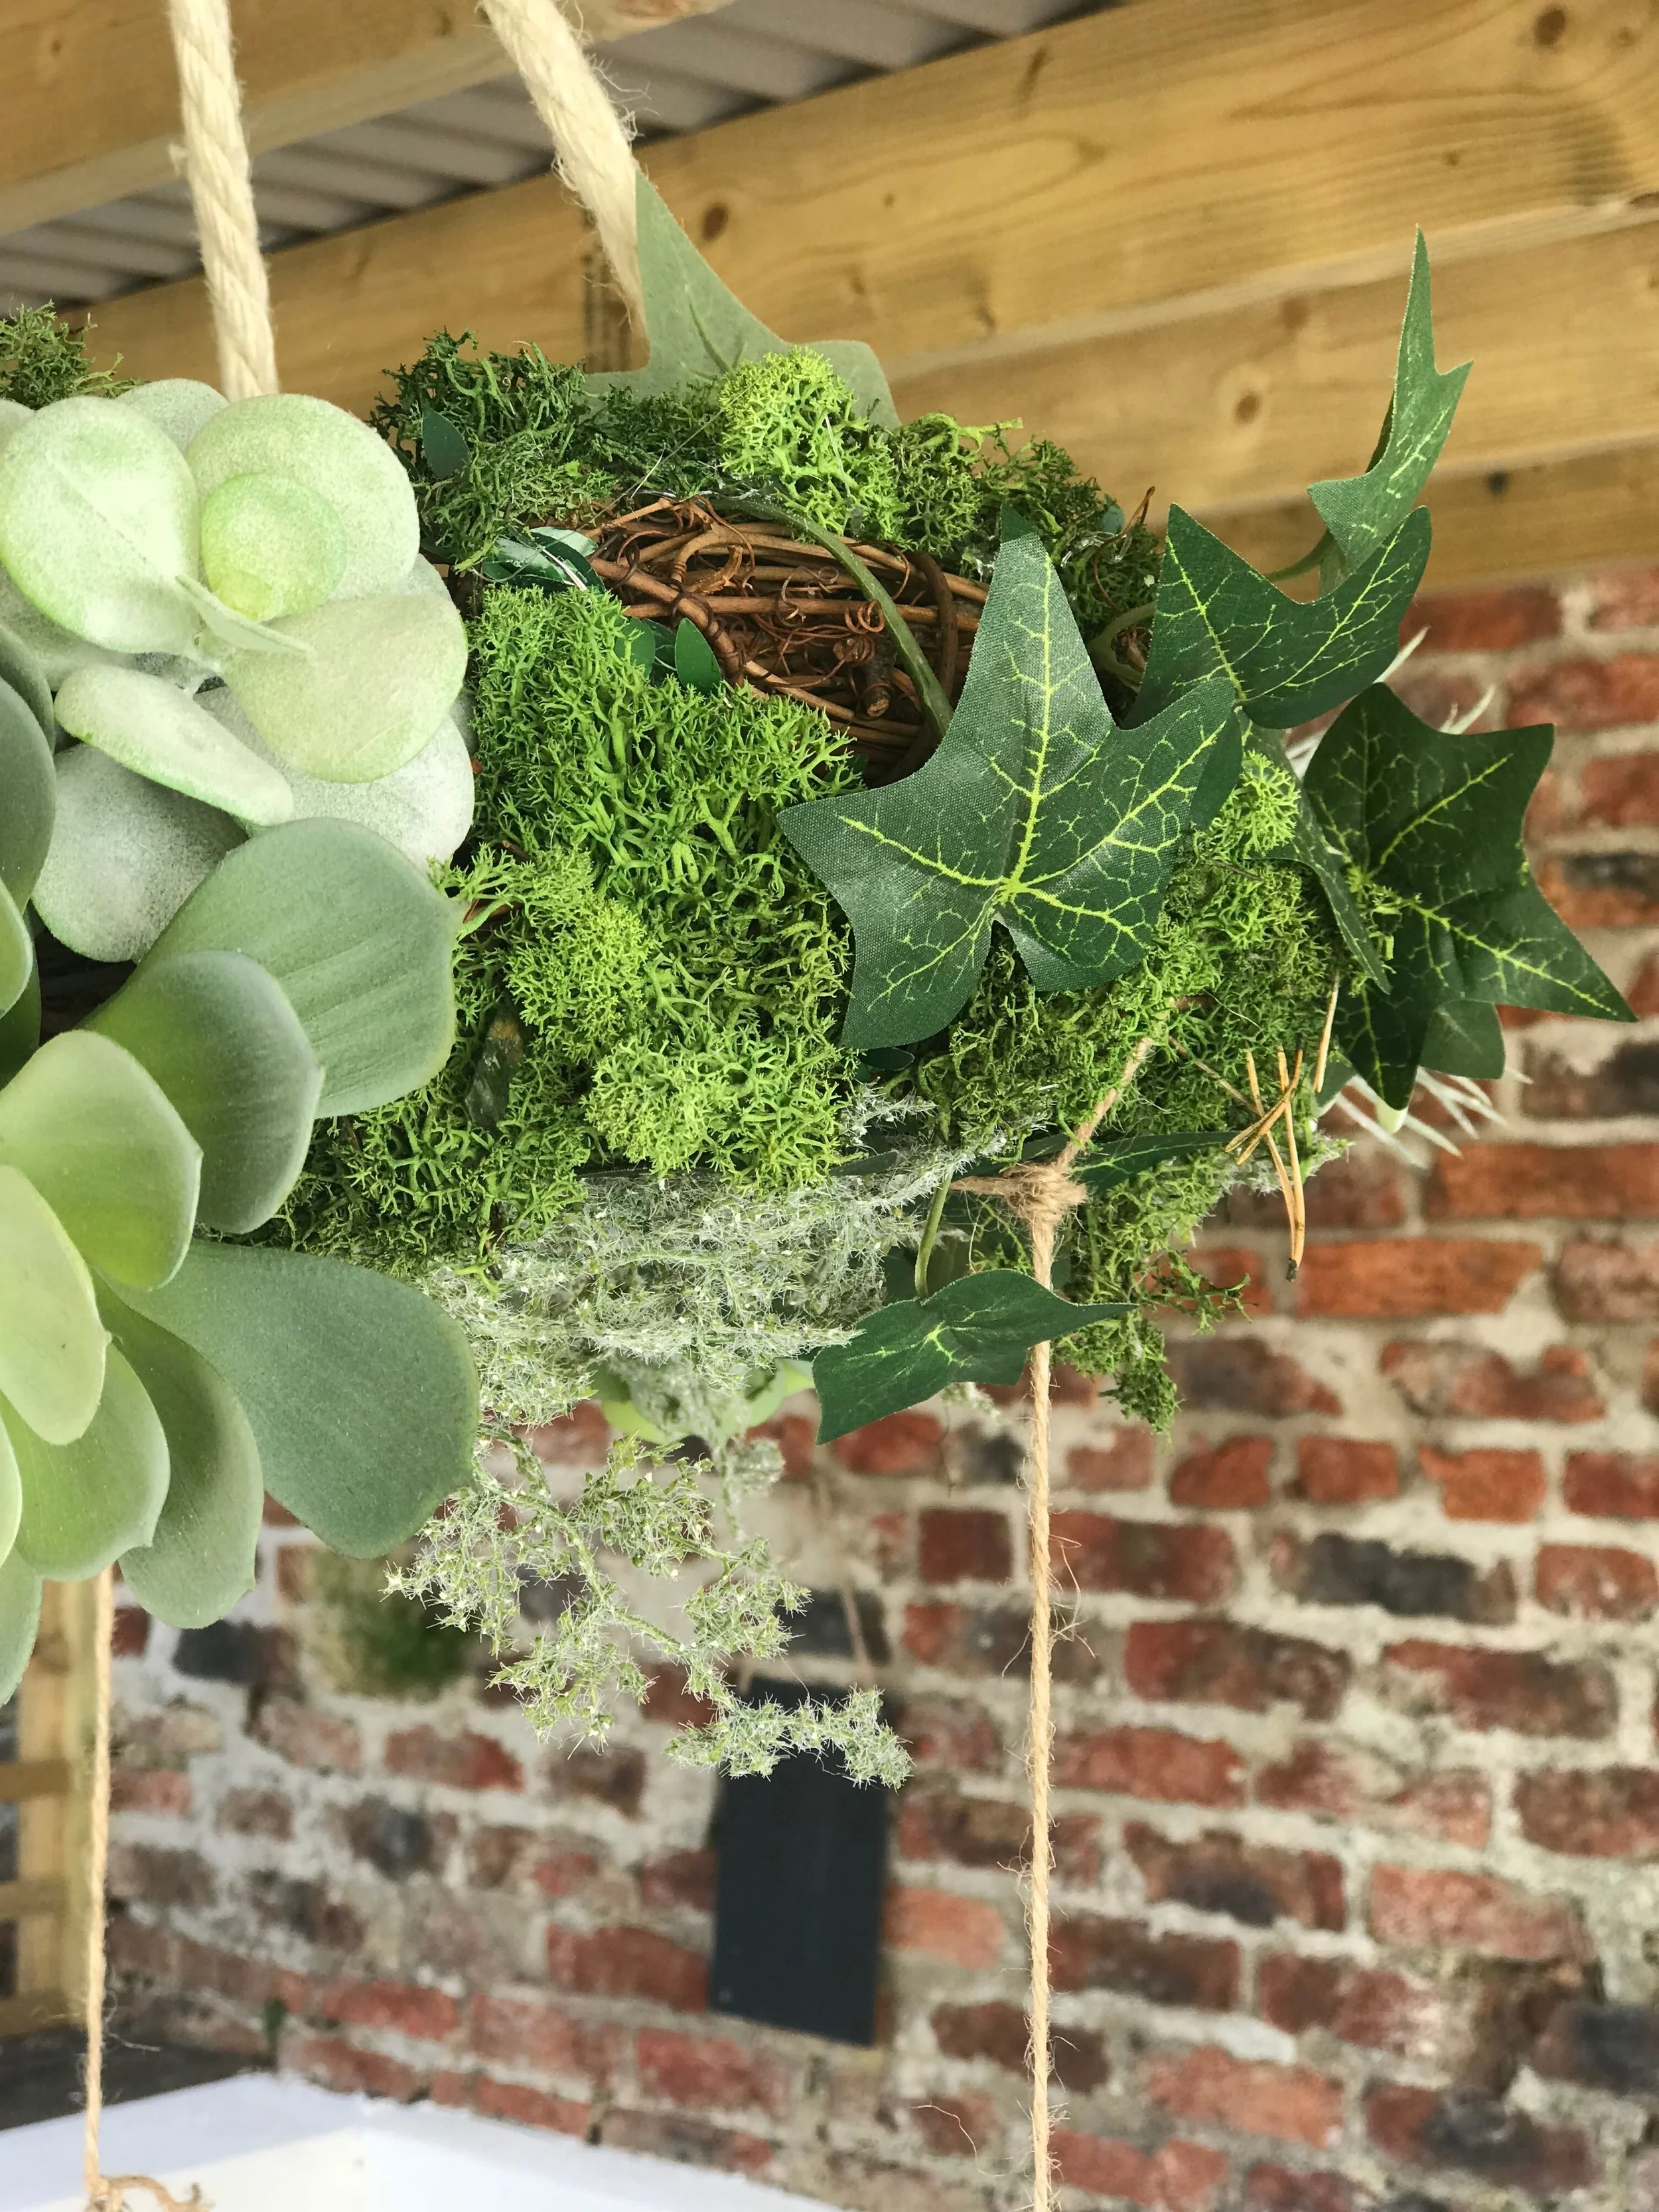
Step 4 - Add The Moss
I used the glue gun to secure the moss in the spaces created by the succulents. Firstly, I covered the sides, taking care not to hide the Ginger Ray foliage string lights. I then turned the wreath upside down and used moss along the bottom of the wreath, as this would be the area that would be seen from below. When every area was covered, I left the wreath to dry for two hours.


Step 5 - Hang The Wreath
I used a large nail in the ceiling of the pergola, above the centre of the dining table. I pulled the four rope lengths together and looped to make a knot. It took a few times of doing this to get the correct length for the drop, bearing in mind that the glass baubles were yet to be added. I hung the wreath from the nail and hid the remaining rope along the beam, although it would be perfectly fine to cut it shorter.


Step 6 - Add The Glass Baubles
I used jute twine cut into 50cm lengths and tied them to the bauble hooks. I then attached the twine to the wreath at equal spaces, looping it around the circle. I decided to hang the baubles irregularly but it would look just as good with the same drop. I then added the tea lights to the baubles.


Step 7 - Decorate The Table
After adding a cream tablecloth to the table, I used Ginger Ray beautiful botanics vines as a centre piece. I only used a few of them but they come in packs of five, perfect for both the table and for hanging as a garland.


I'm super happy with my hanging wreath and now intend to make a second so that I can have double the impact over the table. The lights give a soft glow and it's pretty enough to look good during the day and when the nights draw in. It needed no special skills to make and used simple tools and products but looks super effective. And the best bit is that I really enjoyed the process of making it - I spent a couple of very happy hours outside with the radio on, it was hugely therapeutic. There's nothing more satisfying than producing something yourself using a bit of creativity!