
Ten Steps To The Perfect Gallery Wall
I’ve always loved a focal wall. When I was a teenager my walls were adorned with posters of Wham and Bucks Fizz (if you didn’t want a primary coloured leotard and rip off skirt, were you even there in the eighties?). For me, it’s like pulling a collection together. I first started curating wall displays when I was collecting art deco mirrors - picked up cheaply in charity shops and house clearance sales, individually they were pretty but fairly non descript. Group seven together and they become a focal point, an area of attraction to draw your eye. I realised that the same applied to wall art - individually, you might give it a quick glance and move on. But include a piece in a gallery wall display and you can’t help but investigate further. It’s impactful, in your face bold and most of all interesting. Which is what life is all about, hey?

My first attempt at a gallery wall. Hmm.
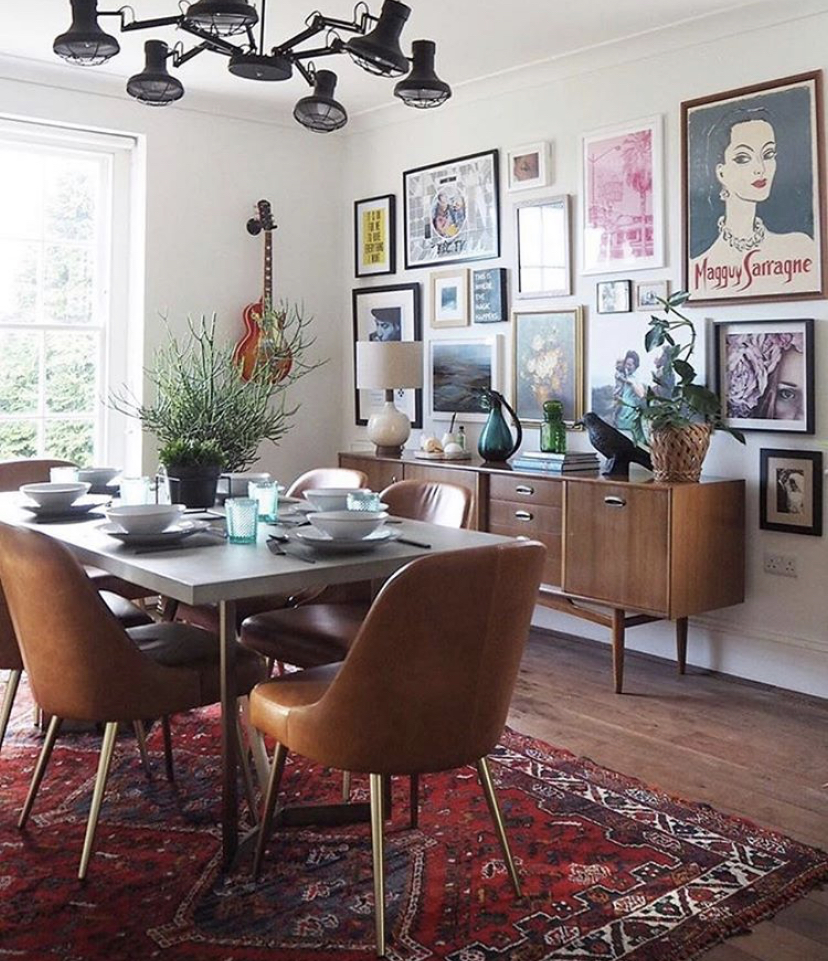
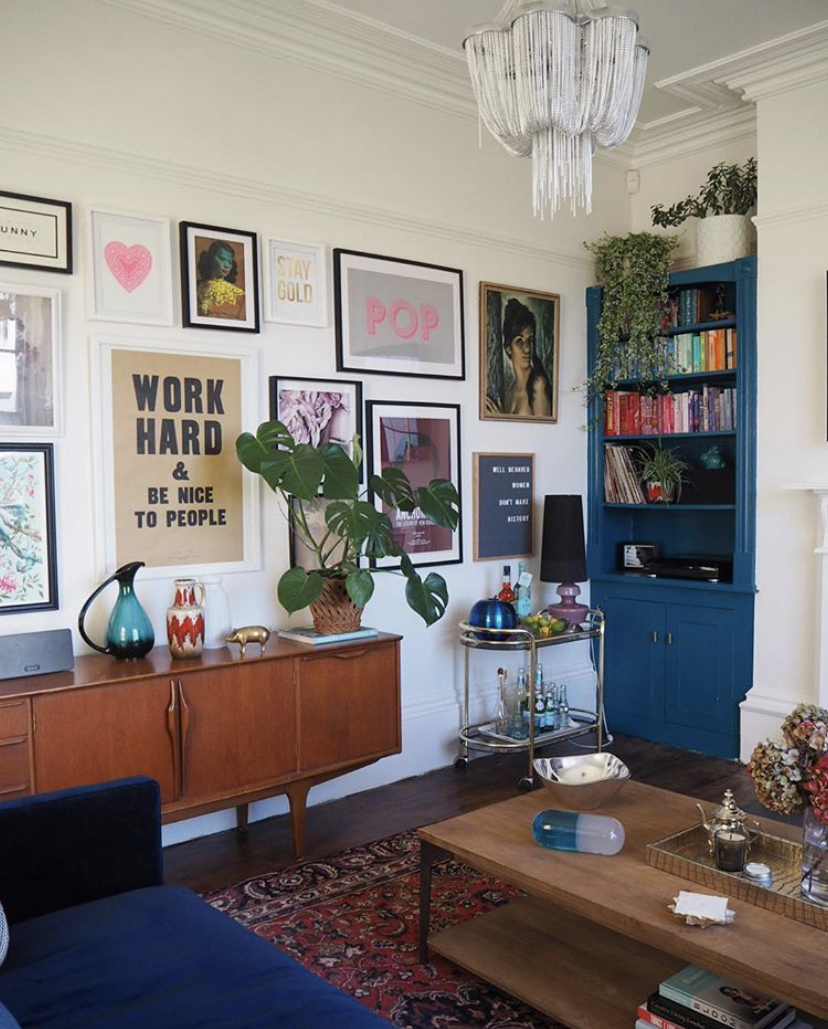
The first hardcore gallery wall I ever put up was in my dining room. I’d seen a photograph on Pinterest (the root of all evil when it comes to redecorating temptation) of a Georgian house where the home owner had created a gallery of epic proportions. They’d kept the rest of the room simple, no patterns or loud colours. This meant that the wall was the main feature, there was nothing else to distract you.
I started small with maybe seven frames, then over the course of the following months added gradually until the entire wall was filled with art prints. I was totally smitten. I loved the way it stood out, I loved the way that it included both prints and personal memories, pictures of my family merged beautifully with typography and charity shop finds. Since then, I’ve included gallery walls in several rooms of my home and they never fail to make me happy.
Which leads me on to the purpose of this blog. One of the questions that I am asked daily is, how do I create a gallery wall? So many of the people who contact me worry that they won’t ‘get it right’. The answer to this is simple - it’s your gallery wall, you decide how it will work. There are no set rules, what you put on your wall should purely be based on what you love. If you love it, it will come together. But there are things that you can do to help you create a display that will make you happy. Here’s my ten step plan to the perfect gallery wall.
Find The Right Spot
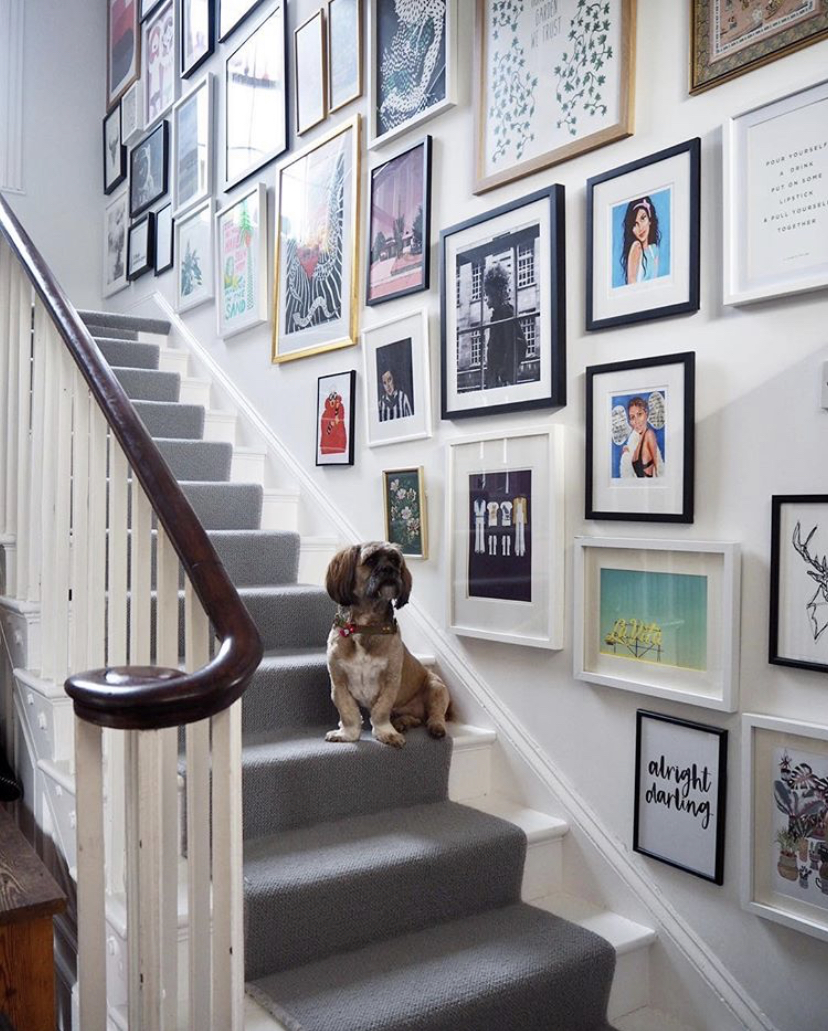
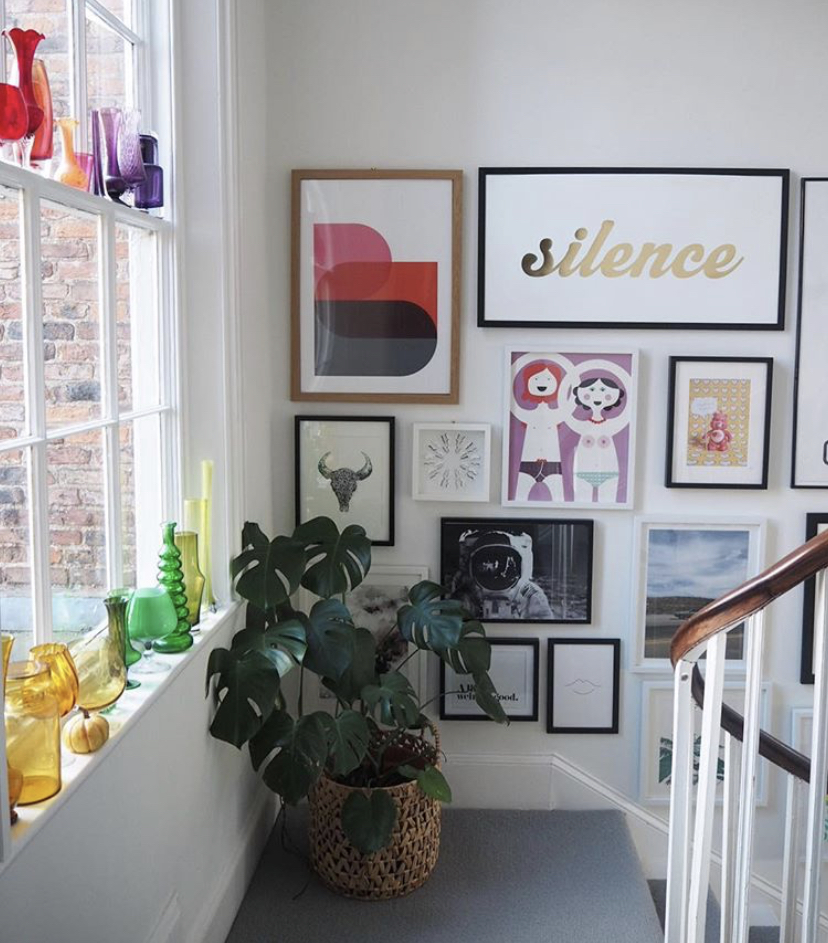
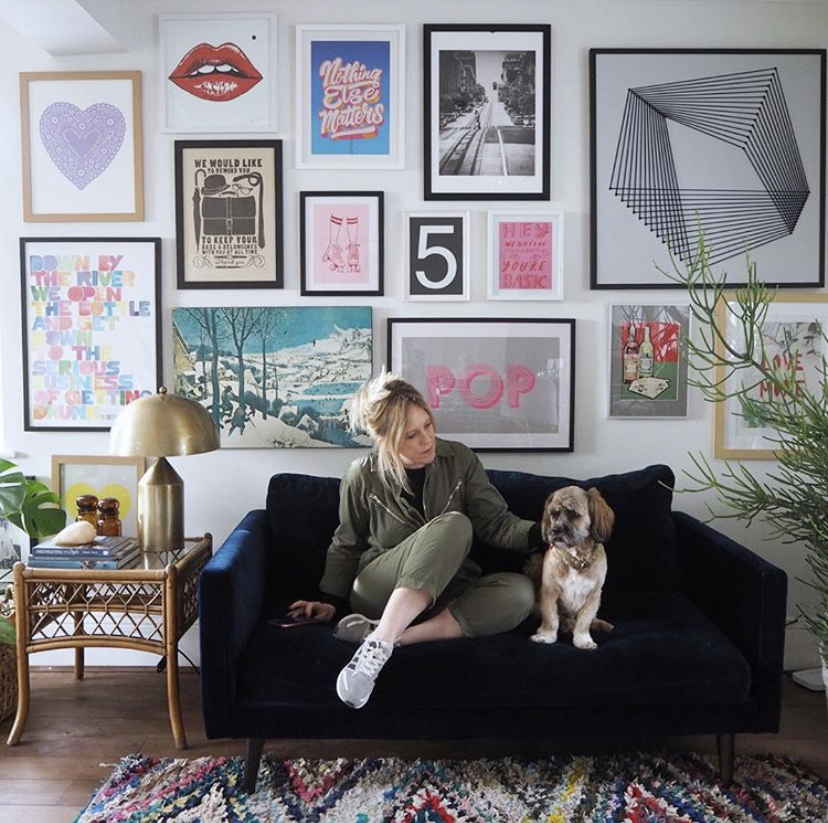
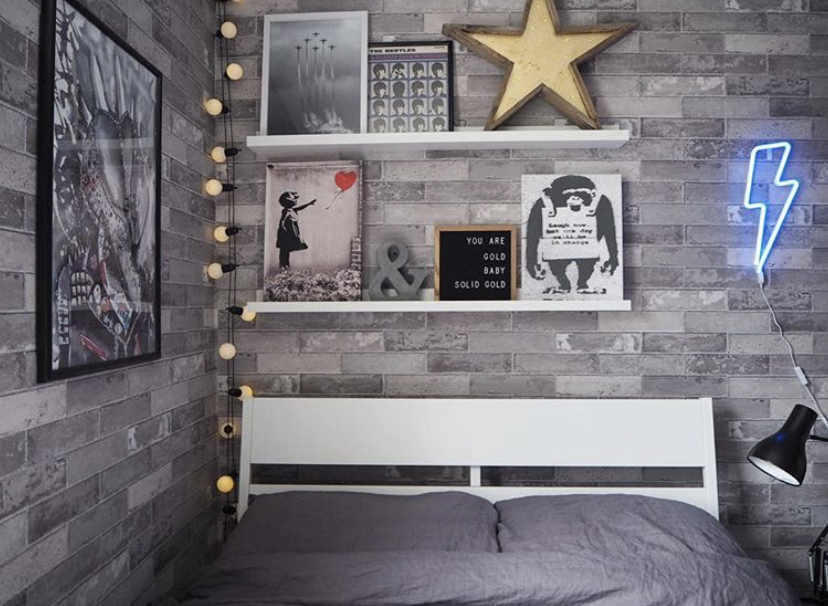
The best thing about a gallery wall is that anywhere goes. Any space, any size, any position - they brighten and add interest to a space that otherwise would be lacking. The aim is to create a focal point in your room and this doesn’t have to be in the obvious position. A feature wall is perfect but also think outside the box when it comes to positioning. What about a small corner? A set of prints, a cosy chair and a lamp create the ideal spot for relaxing. A staircase is another often under utilised space - perk it up with a picture run. Landings also work well for this purpose - high traffic areas that often are ignored when it comes to decorating. If it’s a difficult space to visualise, try picture ledges (you can pick these up in IKEA super cheap) - these give you the ability to move your prints around as and when you feel like it. I have a run of these on my landing and I’m always swapping them about.
Frame It Up
So, where to get the frames? Personally, as someone with a passion for prints, I don’t want to spend a fortune on framing them up. Custom framing can be very costly so I generally explore all other options before I go down this path. My go to High Street stores are The Range, Wilkos, B&Q and IKEA where you can pick up standard sized frames at very reasonable cost. Amazon also have plenty to choose from, often delivered free with Prime so you’re quids in. Another good tip is to try the charity shops who often have an abundance of frames, both old and new. This has an extra benefit as you’ll pick up something a bit more unusual and maybe even vintage that will work well to give your scheme a bit of an edge. If you’ve got a special print or something that isn’t bog standard, then the best place I’ve found online is Frames.co.uk. They offer regular discounts and you can choose both a frame and a mount, if required, that is made to measure.
Think Outside The Box
Who says a picture needs a frame? Try spring clips - a Command Brand product similar to large pegs - that can clip in the corners and hang poster style prints. you can use a poster sticker to keep the base of the print in place. Or try poster hangers - a magnetic strip of wood or plastic along the top and bottom of the print hung with cord. These look great and require no heavy duty hanging equipment so great for rental properties. Or try washi tape to secure the corners, a cheap and easy fix but one that looks great juxtapositioned with other styles of hanging.
Curate With Care
Remember the mantra that your home should only include items that make your heart sing? This particularly applies to your walls. Go for artwork that really appeals to you and makes you smile. Collate what you have and lay it all out. Look at it with a critical eye. Do you really love that print? Are you over that canvas? Be ruthless - if you don’t like it when it’s on the floor, you’ll like it even less when it’s on the wall. Avoid being trend led and consider carefully before you include a piece as part of a main display whether or not you really do love it. Shop your home for other art that could work in the room you are planning - some prints look better as part of a curated display than individually.
Juxtapose
Juxtaposing different styles of art and frames is what really makes your walls stand out in a crowd. Mix it up - from a vintage print picked up in a junk shop that caught your eye, to a framed ticket from your first gig (mine was David Bowie Serious Moonlight Tour, btw, a fact I like to think is very cool despite the fact I was only eleven at the time and had no idea about coolness). On my own wall, I have old family photographs that I’ve framed, limited edition favourites, charity shop buys and blown up canvas photography that I’ve taken myself, even a guitar that belonged to my Dad. There’s no rules when it comes to what you put on your wall and the contrast of old and new, large and small will look good to the eye and create a display worth looking at.
Lay It Out
Okay, so the best way to plan out your wall is to lay it all out beforehand. I have a failsafe way to do this and that’s to use a rectangular rug. Start in the bottom left hand corner, adding prints one by one. Move them around one by one until you are happy with the plan. If you are a fan of symmetry, then make sure it’s COMPLETELY symmetrical. Don’t do halves - either go all out symmetry or be eclectic and mix it up. Mid way or half hearted won’t tick the box. Don’t be worried if you don’t get it all perfect immediately. It takes time to find the perfect position for each item. And, of course, it doesn’t have to be rectangular - this method is simply to allow you to work within a boundary, a fact which is super helpful when confronted with a pile of prints to position.
Space It Out
The frames don’t need to match but you do need to be consistent when you are planning your display. You may decide to match all your frames in the same colour and that’s fine. But if you’re aiming for an eclectic look with mixed materials, then you need to alternate. Try not to block colour, ensure that the different textures of frame are evenly spaced apart. Mix up the big and the small frames. The same applies to the picture type - for example, juxtapose by placing photography next to art print. The idea is that the eye is drawn to several different areas at the same time, adding interest to the wall display.
Get Hanging
So you’ve planned it all out and you’re ready to hang. Measure the wall so that you can pinpoint exactly where the display will be placed. You want to transfer exactly what you have on your floor on to your wall. The best way to do this is to start, once again, in the bottom left hand corner. Work your way up vertically to the top left hand corner and then across, filling in the gaps below as you go. Try and keep to the same spacings as you had on your rug template but don’t worry if you go off piste a bit, it doesn’t have to be perfect.
Use The Right Fixings
So what to use? As a woman with more gallery walls than the Tate Modern, I like to think I’m quite experienced in this area. Here is my rule of thumb:
Large heavy glass or heavy frame: Always a drilled hole with rawl plug and nail. I’ve made many a mistake in the past where I’ve thought it was light enough for a picture nail and it’s not done me (or the furniture beneath) any favours. If in doubt, get the drill out.
A3 sized glass frame and below: Gold picture nails. I actually swear by these, I’ve been using them for years. You can get them in packs from B&Q, anywhere really, and they come with two nail hooks or one nail hooks. All you need is a hammer and you’re away.
Perspex framed pictures or canvas: I use Command Brand (not an ad btw, I just rate them). These are adhesive fixings that attach to your wall via a tab attached to the back of your picture. The best thing about these is that as long as you follow the instructions carefully when applying, you can remove them with no residue from the wall if you take the picture down. This makes them perfect for rental properties in particular. Make sure you buy the correct weight tabs for your size of picture - this is really important.
Be Brave
Finally, I receive many messages from people saying that they don’t think they can do it or they can’t make it work, but have confidence in yourself - you can do this. It’s not rocket science, it’s just putting some pictures on the wall and if you follow my steps above you simply can’t go wrong. BE BRAVE and give it a go.


So that’s my ten steps to the perfect gallery wall. Your gallery wall will be an expression of your personality and a reflection of the things that you love. It’s a great way to add a focal point, colour and interest to your room, drawing the eye to look closer and is always an excellent talking point. And once you’ve created your perfect display, you’ll never look back. Try it! And make sure you tag me so that I can see what you’ve done. Happy planning!